Commercial and new-build rendering
Commercial and new-build rendering in Leeds
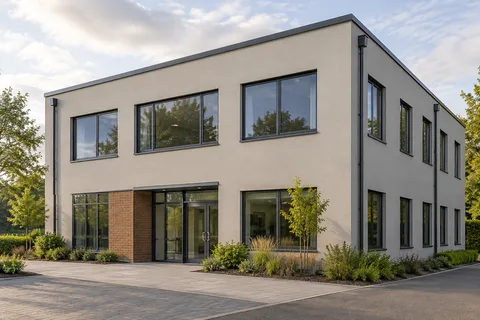
On commercial and new-build jobs in Leeds, the buildings range from shopfronts with flats over them to offices, industrial units, apartment blocks and estates of new houses. The materials are the same families found on homes, from one-coat monocouche to resin finishes on a reinforced base, dry dash and insulated facades. What changes is scale: longer elevations, fresh backgrounds, other trades working alongside, and tenants or customers who still need to get in.

On this page
New-build walls
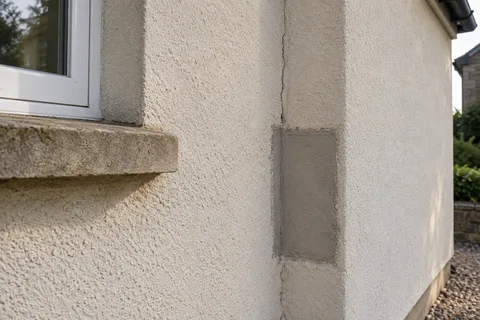
Fresh blockwork suits a single thick render that does the levelling and the colouring in one go. Parex's Monorex GM, for example, goes on as an 18mm coat and is scraped back to no less than 15mm, and on very absorbent or very smooth blockwork it needs a key coat left at least 48 hours first. On framed buildings, the render goes onto carrier boards instead, with a meshed base coat and a thin silicone or acrylic finish.
Consistency is the challenge on long elevations. Parex says to use the same batch number for a facade and to scrape each elevation at the same stage, because early scraping gives a darker shade and late scraping a lighter one. On a terrace of new houses, that means planning deliveries and labour so each run is finished in one go.
Confirm the blockwork or carrier boards are complete, dry and true, with openings and penetrations finished.
Mark bead lines, movement joints and working breaks on the elevations.
Apply any key coat the backing needs and let it dry.
Fix beads and starter tracks and mask frames and glazing.
Apply the render or base coat across each elevation in one session.
Scrape or finish each elevation at one stage and from one batch.
Protect finished work from weather and following trades, and record what went where.
- Background and drawings Blockwork, board or existing façade checked against the specification.
- Set-out Beads, movement joints and bay breaks marked from the drawings.
- Basecoat and mesh Mesh across board joints, openings and changes of background.
- Finish in bays Each bay is finished in one go so day-joints do not show.
- Inspection and handover Hold points and the installed products are recorded.
The usual order of work. The survey and the chosen products decide the actual steps.
Joints, heights and responsibility
A joint is needed wherever the background switches material, say blockwork meeting a concrete frame, and at the spacings a designer sets along long walls. They are formed with beads and shown on the drawings. Working breaks go at natural pauses in the elevation, and Structherm asks for their positions to be settled with the architect whenever a wall cannot be completed in a single operation.
Height matters as well. Structherm's NSC2 data sheet limits that thin-coat insulation system to buildings up to 18m, and taller ones take a different specification. For flats and taller blocks, someone with design responsibility has to choose the system, check its certification and confirm that it meets the building regulations.
Working on occupied premises and busy streets
On an occupied building the first job is to tap the old finish all over and decide whether it can be patched and recoated or must be stripped. Signage, lighting, cameras and cabling are taken down and later refitted, often by other firms. People still using the building, whether customers, staff or residents upstairs, need a covered route beneath the scaffold, and the loudest stripping can be timed for when the premises are closed.
Leeds City Council requires permission for scaffolding, access platforms and materials placed on a road or pavement, which affects almost every high-street frontage. Some commercial centres are also conservation areas; Morley's town centre, for example, now lies within the enlarged Morley conservation area designated in 2025, and changing a frontage finish there needs checking with the council.
Protecting new render from following trades
Fresh render is easily damaged by the work that comes after it. Scaffold ties pulled out of a finished wall leave holes that need filling in the same material, sign brackets drilled after the finish leave cracked edges, and mortar or plaster splashes stain light colours. Plan tie positions so the holes can be made good before the final coat or hidden at bead lines, fix sign brackets, cable routes and lighting points before the finish, and keep finished elevations sheeted while other work continues above them.
Handing over a rendered building
Whoever looks after the building next needs to know what is on its walls. Keep the product data sheets, colour and batch references, and an elevation drawing marked with the systems, joints and any areas left in their original finish. Weather records help too: Parex gives minimum application temperatures of 5°C for light colours and 8°C for dark colours, and if a shade difference appears later, knowing when each elevation was done helps explain it.
Common questions
What information is needed if the business remains open?
Entrances and fire exits that must stay usable, delivery times, the areas residents or staff use, and the person who can make decisions on site. The working sequence is planned around those.
Monocouche or thin-coat silicone for a new block of flats?
Either can be right. It turns on the background, the building height, the texture wanted and whether insulation forms part of the wall.
See housing and planning information for Leeds and nearby places, including the source and geography behind each figure.