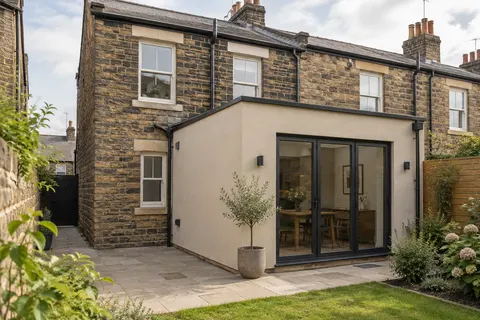
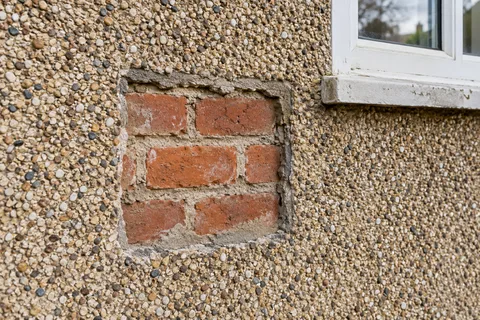
House rendering
House rendering in Leeds
Rendering a whole house means taking every external wall through the same sequence: strip or prepare, repair, fix beads, apply a base coat and finish. In Leeds that house might be a back-to-back with one or two outside walls, a through-terrace with a front and a yard behind, or a semi with a bay and a full side elevation. The method barely changes between them; the number of faces, the access and the front material change a great deal.

On this page
Count the walls before anything else
House type decides the size of the job more than floor area does. A back-to-back shares its rear wall with the house behind, so a mid-row back-to-back may have only its front to render, and an end house a front and a gable. Research from the University of York traces back-to-back building in Leeds from 1787 until new construction was prohibited in 1909, and the Morley conservation area appraisal describes back-to-back and through terraces surviving there. A through-terrace has a front and a rear, often reached by a passage or back street. A semi adds a full side wall, and sometimes a bay with its own small roof to render beneath.
Then look at what the front is built of. In the Morley and Headingley Hill conservation areas, council appraisals describe sandstone and red brick, with stone sills and lintels, as the main materials. A painted or previously rendered brick front can be re-rendered. A stone front that has never been covered is a different decision, and the Headingley Hill appraisal says the rendering of stone walls there should be avoided.
- Scaffold and protection Windows, doors, paths and planting are covered; downpipes, lights and satellite brackets come off.
- Old finish tested or removed Failed render is removed; the survey decides whether any sound areas can remain within the specified system.
- Masonry repairs and beads Cracked bricks and open joints are repaired; corner, stop and base beads are fixed.
- Base coats Sand-and-cement scratch and float coats, or a manufacturer basecoat with mesh.
- Finish coat A painted, scraped or thin-coat coloured finish, applied in suitable weather.
- Fittings and junctions Fittings are refixed through the new surface; sills, roofline and abutments are sealed.
The usual order of work. The survey and the chosen products decide the actual steps.
What happens on site
The finish chosen sets the thickness. A scraped through-coloured render is thick: Parex's data sheet for its Monorex GM asks for an 18mm coat, scraped back to no less than 15mm. A thin silicone finish sits on a separate base coat; Structherm's silicone topcoat is applied only as thick as its largest grain, over a base coat that has been left at least 14 days. A sand-and-cement render mixed on site goes on as a scratched undercoat and a floated top coat, and is then painted. The thicker the build-up, the more the new face stands out from the neighbours' walls and the more the sills need to project.
Where a front wall rises straight from the pavement, check how close the DPC is to the paving. The render should finish on a bell-cast bead above it, which Catnic describes as letting rainwater drain clear of the wall below, rather than running down to the flags where it would stay wet.
Survey every face: tap for hollow render, map cracks, find the DPC line and check sills and bay roofs.
Arrange scaffold, including any highway permission for a pavement frontage.
Strip failed render and carry the debris out by the agreed route.
Rake out and repoint loose joints, replace damaged brick or stone and dub out hollows.
Fix a bell-cast bead above the DPC, stop beads at neighbours' walls and corner beads on angles.
Apply the base coat with mesh, reinforcing the corners of every window and door.
Apply the finish one full elevation at a time and protect it while it cures.
Refit downpipes, lights and brackets and check sills and edges before the scaffold comes down.
Scaffold, pavements and the house next door
Leeds City Council requires permission for scaffolding, access platforms and building materials placed on a road or pavement, so a terrace front on the footway usually needs a licence before the scaffold goes up. On a terrace, the scaffold may also need to cross in front of a neighbour's windows, and the new render has to stop cleanly at the party line with a stop bead so their brick or render is left untouched. A downpipe on the party line may serve both houses and needs agreeing before it is moved.
At the back of a through-terrace, old render and new materials may have to travel through a passage, a yard or even the house. Bagging debris and carrying it out by hand is slower than a skip under the scaffold, and it affects how the job is staged.
Rules that can change the job
Leeds has 80 conservation areas. Adding new render cladding to a house there is outside householder permitted development rights. Repairs that leave the appearance materially unchanged are a separate question. Outside them the rules are looser but still come with conditions, including one on materials, so check with the council before committing to a new look. Building regulations apply as well: Approved Document L classes a new render layer on an external thermal element as renovation; once more than half of that wall, or more than a quarter of the whole envelope, is involved, the whole wall is expected to meet a better insulation standard unless that proves technically, functionally or economically unworkable. Ask building control at the start.
Common questions
Who coordinates windows and rendering?
Agree it before either trade starts. New frames are best fitted before the render so sills and reveals can be finished to them; fitting windows afterwards means cutting and patching fresh render.
Can I render my terrace if the rest of the row is brick?
Possibly. In a conservation area it needs planning permission. Elsewhere it may be permitted development, but the conditions include one on materials, so confirm with Leeds City Council first.
See housing and planning information for Leeds and nearby places, including the source and geography behind each figure.