Render repair
Render repair in Leeds
A render repair deals with a defined area: a crack, a blown patch, a broken corner or a failed old repair. It is the right job when the rest of the render is still sound. The skill is in finding why the render failed, cutting the repair back far enough, and rebuilding it in a material that suits what is around it.

On this page
Common defects and what they usually mean
Render at the bottom of a front wall that is crumbling or stained often means it was carried down over the DPC to the pavement and stays wet. A crack running from the corner of a bay or a window usually shows stress around the opening. A straight vertical crack where an extension meets the house is often movement between two walls built at different times. Render pulling away under a verge, a gutter or a sill points to water running onto the wall from above; the SPAB stresses that leaking rainwater fittings concentrate wetting, so the fitting is fixed before the render.
Hollow areas are found by tapping. Render that sounds dull or drummy has lost its bond even if the surface looks intact, and it may come away in a slab. On a rental property, that is also a safety question: a loose patch above a doorway or a path should be made safe quickly, and tenants should not be asked to poke at high render themselves.
- Map the damage Tapping finds hollow areas; cracks and their likely cause are noted.
- Cut back Failed render is cut out to a sound edge, usually squared off.
- Fix the cause Leaking gutters, sills without drips or render below the DPC are dealt with.
- Rebuild in coats Using a material compatible with the surrounding render and masonry.
- Blend the finish Texture is matched; colour may need a coating over the wider area.
The usual order of work. The survey and the chosen products decide the actual steps.
How the repair is carried out
Edges are cut straight rather than left ragged, so the new render bonds to firm material and the outline is easier to disguise. The patch is built up to the same depth as the original in the same number of coats. Where a crack ran from an opening, mesh set diagonally across the corner helps stop it returning. At the base of a wall, the repair is a chance to finish the render on a bell-cast bead above the DPC; Catnic describes that bead as letting rainwater drain clear of the wall below.
The repair material has to suit the original. Cement patches on lime render crack at their edges; a sand-and-cement patch on a silicone system will not take the same finish. Using the same system's base coat and finish gets closest.
Find and fix the cause: a leaking gutter, a flat sill, render bridging the DPC or an unreinforced opening.
Tap round the defect and mark where sound render starts.
Cut the patch back to square, sound edges.
Clear loose material and repair the masonry behind.
Control suction by dampening or priming.
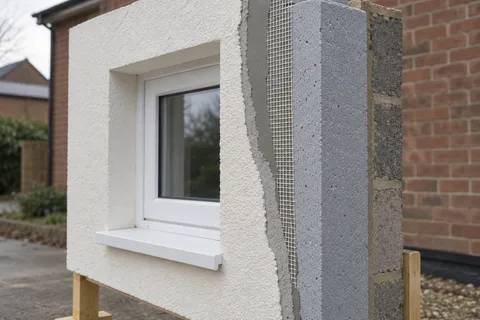
Rebuild in coats to the original thickness, bedding mesh across any crack line.
Match the surface texture and, on painted render, recoat the elevation.
Matching and what you will see afterwards
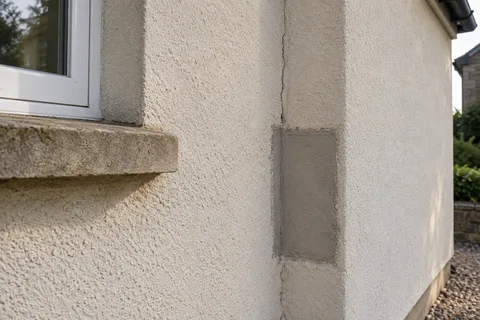
A new patch on an old wall usually shows at first. On a painted render, the fix is to repair and then repaint the whole elevation; Structherm's masonry paint guidance, for example, is to carry out all necessary repairs before the coating goes on. On through-coloured render, a patch will look fresher than the weathered wall around it, and you either accept that or recoat the face. Agree before work starts which of those you are paying for, so a visible patch is not mistaken for a poor repair.
Repair or re-render?
When the tapping shows more hollow render than sound, a repair is only moving the problem along. The same is true when patches have failed more than once in the same places. At that point a strip and re-render of the elevation, done once, is more reliable than a series of patches.
For example, on a hypothetical rented through-terrace, the tenant reports a damp patch below the front bedroom window. Outside, the stone sill sits almost flush with the render and a crack runs down from its corner. The repair is not just a patch: the sill needs to throw water clear, so it is extended or replaced with a drip, then the cracked render is cut out, the corner meshed, the patch built up and the front recoated.
On a rental, keep a short record of what was repaired, where, with what material, and what caused it. When a new report comes in later, the record shows whether it is the same problem returning or a new one.
Common questions
Must tenants leave for a small exterior repair?
Usually not. Most patch repairs are done from outside, though a window may need to stay shut and a path may be closed while the work is overhead.
Should the repair be photographed before it is covered?
Yes. A photo of the cut-back area and the masonry behind shows what was found and fixed, which helps if the wall needs attention again.
See housing and planning information for Leeds and nearby places, including the source and geography behind each figure.