Monocouche rendering
Monocouche rendering in Leeds
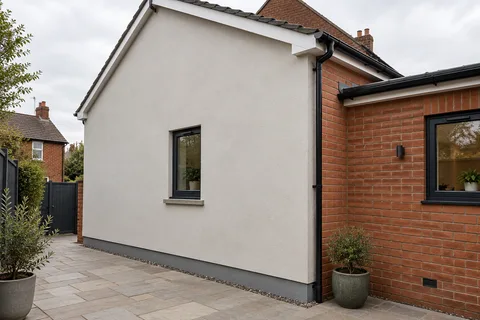
Monocouche is a through-coloured, cement-and-lime based render designed to be applied in one thick coat and then scraped or textured. There is no paint and no separate topcoat: the colour is in the mix. It is at its best on new or nearly new blockwork, such as a Leeds extension or a new house, where the wall is even and clean and the render can do its own levelling.

On this page
What monocouche is made of and how thick it goes on
Parex's data sheet for its Monorex GM gives a clear picture of a typical product: a hydraulic mortar of cement, lime, siliceous and calcareous sands and mineral pigments, mixed only with water and sprayed by machine. For a scraped finish, it is applied as a level 18mm coat, left for 3–16 hours depending on the backing and drying conditions, then scraped in small circular motions, removing no more than 3mm, to a minimum finished thickness of 15mm. It can also be sprayed with a textured finish instead of scraped.
That thickness is the point of monocouche: it levels and weatherproofs a wall in one material. It also means the finished face stands well forward of the blockwork, which affects sills, reveals and the junction with any brick that stays.
- Background Usually blockwork or brick; uneven or mixed walls may need a levelling coat.
- Beads and mesh Beads at corners, reveals and the base; mesh over junctions and lintels.
- Monocouche passes One through-coloured material, applied in passes to the specified thickness.
- Scraped surface Scraped once partly set, which removes the skin and leaves the texture.
Wall on the left, finish on the right. Not to scale: coats, thicknesses and primers follow the chosen manufacturer’s system and the condition of the wall.
The process, start to finish
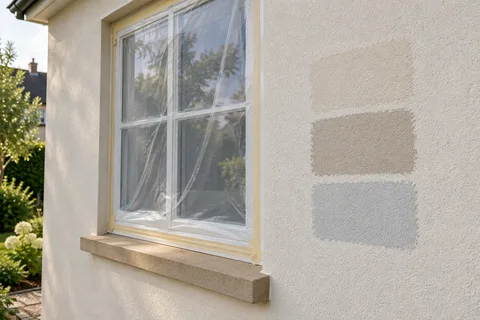
Timing is everything with scraped render. Parex warns that each elevation must be scraped at the same stage, because early scraping gives a slightly darker shade and later scraping a lighter one. It also says to use the same batch number across a facade and to apply and finish whole elevations at the same time. In practice that means planning the spray around the size of each wall and having enough people to scrape it all in the right window.
Some backings need extra steps. On low-suction surfaces such as dense concrete, or high-suction ones such as aircrete, Parex specifies a key coat first, allowed to dry for at least 48 hours, and says mesh may be needed depending on the backing and specification.
Check the backing is sound, clean, dust-free and unpainted.
On very absorbent or very smooth blockwork, apply the key coat the product requires and let it dry.
Fix beads, add mesh where the system or backing needs it, and mask windows and doors.
Spray the full coat over a whole elevation and rule it flat.
Scrape the entire elevation at the same stage once it has firmed.
Brush off the dust, inspect the whole face and correct blemishes straight away.
Protect the render from rain, frost and drying sun while it cures.
Where it is not the right render
Monocouche is less forgiving on old walls. Parex lists painted backgrounds as unsuitable unless they are specially pre-treated, along with weak mortar and gypsum plaster. An older Leeds terrace with layers of paint, patching and mixed brick is often better served by a full base coat and a thin-coat finish, or by a traditional render. It is also a fairly rigid cement-based material, so it is not suitable on a stone or lime-built wall that needs to breathe.
A worked example on a Leeds extension
For example, picture a hypothetical single-storey blockwork extension on the back of a brick through-terrace. The new blockwork is a good monocouche background: even, unpainted and clean. The render stops on a bead where it meets the original brick, so the old wall is not skimmed over; the bell-cast bead sits above the DPC; and the new sills are chosen to project past the 15mm-plus finished face. If the extension is wider than one easy spray, the bead line or a downpipe gives a sensible place for the working break.
Weather and the visible faults
Weather affects the colour as well as the bond. Parex gives minimum application temperatures of 5°C for light colours and 8°C for dark colours, warns against direct sun and hot drying winds, and says not to apply onto frozen, thawing or very wet backgrounds, where discolouration can occur. Patchy shading, visible block outlines and day joints across a wall are the faults to look for. Movement joints and bead lines should be planned on the elevation, not hidden by spraying over them. Through-coloured render needs no repainting, but light colours collect dirt under sills, and patch repairs on a weathered wall rarely vanish, so keep the colour and batch details.
Common questions
Can the render cover a movement joint for a cleaner look?
No. A joint that is needed where the backing changes or a wall is long has to be carried through the render, usually with a proprietary bead. Covering it just moves the crack to a random place.
Why does one wall look slightly darker than the next?
Usually because it was scraped at a different stage or came from a different batch. Parex's guidance is to scrape each elevation at one stage and use one batch per facade.
See housing and planning information for Leeds and nearby places, including the source and geography behind each figure.